Posted by: edibleplanet | September 17, 2012

Experiencing Eggs Goldenrod

When Andy mentioned a dish called Eggs Goldenrod fondly from his Texan childhood, I was intrigued. Growing up with chickens we had egg dishes of all sorts, including one where you make scrambled eggs from the yolk, spread it on toast and then beat the whites, dollop them on top with a sprinkling of cheese under the grill.

We had another dish, I think from a church or a fundraising cookery book, that used up slices of stale bread lining a pan and an egg and cheese mixture in the middle. I had never heard of Eggs Goldenrod.

Naturally I turned to Google and found out quickly that is a childhood comfort food for quite a few Americans. Apparently there is even a recipe in an 1896 Boston cookbook.

There was a posher version of the recipe that suggested it was a dish with French origins called Eggs a la goldenrod.

The recipes were all very similar and I settled on this one that was two servings as I was making it for just me and our son, who is pretty good at eating anything – so was a willing subject, no one else was that keen. One of the lovely ideas I had found out from my quick perusing of the internet was that this dish could be made with the help of kids.

The dish doesn’t sound very appetising when described. It is chopped up pieces of hard boiled egg white floating in a white sauce on toast with grated or mashed, hard boiled egg yolk on the top, with a sprinkling of paprika. But with so many people on the internet remembering this dish fondly, I figured it couldn’t be that bad and it didn’t sound like it would have been too out of place in my childhood’s selection of egg dishes.

When I told Tristan what I was planning to make he was keen to try it and offered to help immediately. I boiled the eggs and Tristan mashed up the yolks and sliced up the pieces of the white. I made the white roux sauce in the usual way, melting the butter adding the flour and slowly adding the milk to make a thick sauce. I added salt and pepper until Tristan and I agreed it was tasty. We tipped in his cut up egg white.

We buttered the toast and tipped over the white sauce with its little white lumps, looking like shark fins. We sprinkled over the egg yolk and good quality Hungarian paprika.

I will agree this dish doesn’t sound or look appetising but it is most definitely a homely, comforting dish. Tristan and I declared it delicious. I would make again for lunch. It is quick and Tristan enjoyed helping to make it.

eggs goldenrod dish

Posted by: edibleplanet | December 10, 2011

Making Glazed Fruit

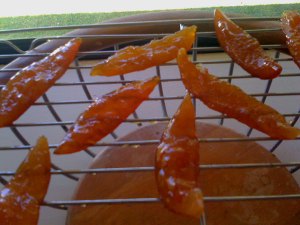
Glazed fruit drying

Glazed peel drying out on the rack

Seeing homemade glazed fruit that had been sitting in syrup for two years inspired us to give it a go making our own. If you google glazed fruit you get many comments saying they are so much better than anything you can buy.

We decided to do orange and lemon peels because we had some. My google searches led to this blog post  which seemed the best summary and written out method we could find. We did adapt however because we were not that keen to add the corn syrup. The corn syrup is stop the sugar from crystalising so we knew that lemon juice and cream of tartar both also stop this process and we had loads of lemon juice from the lemons.

The recipe we did was:

450g washed orange and lemon peels – flesh removed but pith still on the peel

pinch of salt

700g sugar

1.5litres of water (extra water for the initial cook up)

2 teaspoons lemon juice

1 teaspoon cream of tartar.

I put all the fruit in the saucepan and then covered them water and the pinch of salt and boiled them up. The blogpost we were following says until completely translucent. This was a bit subjective as to when they had reached this stage but they were quite soft by the end so I decided they were translucent enough. Because the peel was much thinner it took about 30-45 minutes.

The next bit is then making the sugar syrup by boiling up the 1.5l water and the sugar, lemon juice and citric acid. Once it was boiling and all the sugar was melted. We turned down the element and added the peels. We let them gently simmer for 20 minutes. I left the lid off the pot during this process and the sugar syrup reduced quite dramatically so for the rest of the week we did the simmers with the lid on, though this pot doesn’t have an airtight seal.

We started this project on a Sunday and each day that week, usually while I was making the school lunches, I would put the peel onto gently simmer for 20 minutes. Then the pot would sit on the bench for the rest of the day.

By the following Sunday the sugar syrup was very thick and gloopy and just covering the fruit, which was quite shiny.

The last step is to put the syrup and fruit back on the stove for one last time and bring the syrup and fruit to a temperature of 115C. This took quite a while but finally the magic temperature was reached and I took the pot off the stove to stand over night one more time.

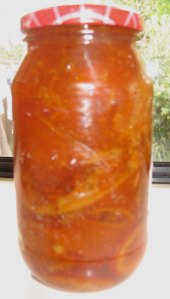
Our finished jar of homemade glazed peel and syrup

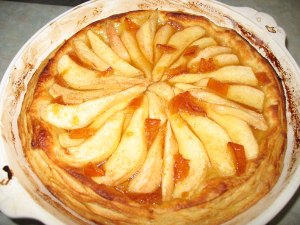
Pear and glazed fruit pie

Our pear and homemade glazed fruit tart, sorry for the burnt butter on the dish I used for greasing. The tart was a triumph!

The peel is definitely tasty as the kids can vouch for. I put some pieces on a rack to dry out. They have been there several days now and are still quite sticky and syrupy. The rest of the peel we have put in a jar with the lovely syrup awaiting a delicious recipe.

We decided to make a tart with some pears that needed using up. We made homemade puff pastry, placed the slices of pear on it with, cinnamon, slices of the glazed fruit and used the syrup to glaze the tart. It was delicious, the tartness of the lemon peel went really well with the rich buttery pastry.

We sell proper maraschino cherries in our online shop and they are quite pricey compared to the supermarket variety. They taste a million times better and now I know process, it makes more sense why proper glazed fruit is expensive. Now I am quite keen to try it with some cherries!

Posted by: edibleplanet | October 10, 2011

My Master Bread Recipe

I’ve been doing a lot of playing around with bread recipes, trying to get to something I would be happy to pay for in a bakery or farmer’s market. I am a big fan of bread and homemade bread is supposed to be better than bread you buy. In my case this hasn’t always been true. I wouldn’t have paid for my own home-made bread (well, not twice anyway) and I had never managed to crack the proper texture that you get from good bread. My bread was always dense and ‘cakey’. Also, I never managed to crack the flavour either. My bread had a strong yeasty flavour – it tasted of ‘home-made’. How on earth do you get to the amazing bouncy, soft ‘breadyness’ of a good professional loaf?

Well, I think I have finally cracked it. These are the important things:

  1. Measure everything by weight – this eliminates all the random variations that you inevitably get when you measure by volume. Especially true if you are sharing recipes with people.
  2. Make sure your bread rises properly in the first instance. You need to get at least a doubling in volume before you proceed. If it doesn’t happen after an hour then I suggest doubling the yeast next time, or buying some different yeast.  Bakels yeast is brilliant.
  3. A long second rising is essential. Don’t rush this step. the dough needs AT LEAST an hour. A long second rising is the secret to the right texture. It gives the dough longer to sit and develop gluten, the yeast also carries on kneading the bread from the inside and you trap lots of lovely bubbles of gas. All these things are good!
  4. The oven must be hot. At least 220 degrees C. When the bread is first put in the oven it rises very quickly before it ‘sets’ into it’s final shape. The hotter the oven, the faster the initial rising and the lighter your bread. It’s a process called ‘oven spring’.
  5. Add some steam. Spray the oven with a bit of water, or place a roasting pan of water underneath the bread in the oven. The water causes little bubbles to form on the surface of the dough which crack and split when we bite into them making the crust crunchy, but not thick and dry.
  6. Bake until the centre of the loaf is at 100 degrees C – when it reaches that the bread is done. No guesswork with ‘hollow sounding’ bread.

Here is my master recipe. Everything is done by weight so it’s easy to scale up or down. It’s quite a wet, sticky dough.

Makes 1 loaf:

375g flour
6g salt
4g yeast
190g – 215g warm water (you may need to adjust this up and down a bit depending on humidity and how dry your flour is. Go with the smaller amount and add more as you need it to get a smooth but quite sticky dough)

  • Mix all the ingredients together. I use the dough hook on my mixer, but you can also use a bread maker on dough setting, or good old-fashioned muscle.
  • Knead until smooth. Kneading is the ‘star’ step that everyone associates with bread making, but it’s not as important as the items above. As long as you get the dough smooth and less sticky than it was then you’ll be grand.
  • Leave the dough to rise until it has more than doubled. Usually about 45min–1 hour.
  • Punch it down to knock some of the gas out of it. Or put it back in the mixer and put it on minimum speed for 30 seconds or so.
  • Line a basket or bowl with a tea towel or some other rough material. Cover the material with flour. Shape your loaf and place it rough side up in the basket or bowl. The bottom of the basket will be the top of your loaf. Fold the excess material over the loaf and leave to rise for as long as you can. At LEAST an hour, but even longer is better.
  • When you’re ready to bake, heat the oven to 220-230 degrees C.
  • Gently turn out your loaf onto a baking sheet. At this stage you don’t want to knock the gas out of it. Gently peel the tea towel off the dough. Note the lovely dusting of flour on the top. It’s not there to make the bread look artisan like they do in the supermarket. It served a real purpose.
  • Feel smug for a few seconds over your amazing, but completely honest artisan bread.
  • Put the bread in the oven. Work fast so you don’t lose the heat.
  • Watch the bread closely and note how fast it rises. Once it doesn’t appear to be rising any more, add a tray of water to the shelf beneath the bread. This is for the crust development.
  • Bake the bread, turning down the oven if it appears to be browning too fast, until it has an internal temperature of 100 degrees (or sounds hollow when you tap it).
  • Let it cool on a rack before eating
This recipe makes perfect bread. When I haven’t had perfect bread it’s usually because I rushed the second rising. I’d love to know if anyone tries this and whether you have success or failure with this technique.
–Karl
Posted by: edibleplanet | September 13, 2011

Uncovering Fake Artisan Products

Currently, much to the delight of our children, we are undergoing a research project for a friend. She is thinking of moving back to Christchurch from Melbourne but one of the things she loves in Melbourne is Jalna vanilla yoghurt and we have been trying out all the yoghurts here to find an equivalent.
One of the first things we found was Kiwis don’t seem to be too keen on vanilla flavoured yoghurt. There were many different kinds of fruit flavoured yoghurts but very few vanilla. We decided to try the different kinds of yoghurts anyway to at least find one that had the right texture. Each week we buy a pottle of any different yoghurt we can find.

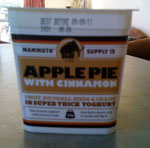
Fake Artisan Yoghurt

One week, while staring at the yoghurt shelves in the local supermarket, we came across Mammoth’s Supply Company Yoghurt, amongst the artisan small producer yoghurts. On the front it said superthick yoghurt and on the side, it had; “made for men – by men (seriously it was made by a bloke named Brian)”. We decided to give the applepie cinnamon flavour a try. On the way home we got to talking about the yoghurt, intrigued that a small producer would make a yoghurt just for men. It seemed a marketing approach that immediately halved the potential market and we didn’t really like the idea of one yoghurt for males and another for females – why can’t yoghurt be for all? It wasn’t until we opened the yoghurt and tasted it, that all became apparent. The product was as it said on the side full of fruits, sultanas, seeds and grains but I knew that yoghurt flavour – it was unmistakably a big brand flavour. It was after this taste test that I looked closely at the fine print – it is a Fonterra brand.
This suddenly made sense of the male marketing approach but it also made us mad. It seemed devious and underhand. We had bought this product, thinking it was an artisan product made by someone who cared. It was in that section at the supermarket, it had labelling using a similar approach to artisan products but it very clearly wasn’t an artisan product. It annoyed me that despite, I thought, a careful reading of the label – I had jumped to conclusions and not read the fine print. I know this is not illegal but it feels unjust.
In New Zealand we have many fabulous small scale producers making unique and tasty products. They don’t compete with the big boys, they work extremely hard creating their own niche. Now here was a big boy muscling in with their huge advertising budgets – television, radio and social network campaigns – pretending to be one of them.
We live in a busy world and slick marketing can make quick work on our distracted minds. It is also makes it hard for those producers that do have a true message about their unique product. Next time I vow to read the fine print.

Posted by: edibleplanet | September 7, 2011

Homemade Corn Chips

lucy selling corn chips

Lucy selling her corn chips and hot chocolate at Kidsfest

Making corn chips is very easy. Lucy decided it was one of the things she wanted to sell at the Kidsfest Market back in July. I was nervous about a six year old and hot oil but we had a big talk about the dangers and Karl took over the overseeing halfway through as he could see me getting more anxious. Obviously the message got through, because part of her selling pitch was “I made them myself and I didn’t end up in hospital!”

Making corn chips is a great way to use up tortillas that are getting stale or if we have made tortillas ourselves and they didn’t quite turn out right or we didn’t use them all up straight away. The quality of the tortilla seems much less important in making chips than eating as fresh tortillas. Disappointing tortillas, say if you bought them thinking they would be great, still seem to make tasty chips. We have regularly made chips from defrosted tortillas too, without any problems.

To make tortillas we use about a cup of masa harina flour, add a teaspoon of salt and mix with enough water to make a dough that is soft enough not to crack when moulded but not really sticky. If we are organised, we leave it to sit for about an hour. If not we crack on making the tortillas. We split the dough into little balls for flattening. These days we use our tortilla press as it is fast and easy but previously we stuck the balls between two pieces of gladwrap and flattened them using a pot with a suitable diameter. The dough is quite soft and with the pot and leaning on top, they flatten pretty well. We cook them one at a time in a hot pan with no oil, flipping once a side is cooked.

However we have ended up with spare tortillas, this is how we make the chips. We chop the tortillas in half and then into wedges, usually about six a tortilla. Once all the chopping is done. We heat up the oil. It needs to cook the chips fast so it needs to be hot! The first chip is usually a sacrificial one, to test if the oil is the right temperature – hot enough to start bubbling and cooking the chip immediately but not too hot that it goes dark brown and horrible before we can get it out again. Our lovely little deep fryer sadly broke and these days it seems only large sizes are on the market, which is a shame. The small size was perfect for not using as much oil to fill it and for the amounts we do at home – mostly corn chips, falafel, Fiby’s Egyptian chicken nibbles and more recently churros! So for us it is out with the small saucepan and turn on the extractor fan full blast.

We cook about three to four chips a time in the small saucepan and they tend to float up when suitably golden brown and cooked. Then after shaking off any excess oil, we tip them onto a paper towel to soak up any residual oil. We usually sprinkle them with salt and cinnamon and they are ready to eat. They seem to last quite well in a plastic bag once cool too. You can just make the chips after cutting by drying them out in the oven at a low temperature until crispy but the deep frying definitely makes them tastier.

So it really is child’s play, just a bit time consuming frying them up.

Posted by: edibleplanet | August 24, 2011

Delicious Places to Eat in Melbourne

There are so many great places in Melbourne to eat, it is difficult to choose but these were the three food experiences I remember most fondly from our trip in July.

Hungarian Noodle Dish

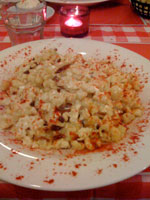
My delicious large plate of noodles and violently smoked bacon

The best meal would have to be at The Hungarian, 362 Bridge Road in Richmond. The food is fantastically Hungarian super filling and delicious – they do takeaways too. The menu is a great read with dishes such as “The secret of Buda, the secret is not out yet so DO NOT ASK!  We make it, you eat it, full stop.” Though it did tell you at the bottom of the menu the ingredients of this dish. I ordered a noodle dish with salted cottage cheese, “violently smoked bacon”, sour cream and paprika. It had a long Hungarian name but handily had a little spot next to it to put your finger on rather than try and mispronounce the name of the dish.

The waiter warned me it was a big dish and I assured him I was very hungry. It was delicious and I very nearly ate it all. If you have spent a day walking all over Melbourne this dish is perfect to fill the appetite. Even though we had thoroughly enjoyed our mains we couldn’t leave without trying the sour cherry strudel. It was delicious, though Karl ate most of it because I was still full from my main dish.

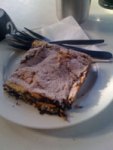
On the Sunday morning we went to St. Kilda to do a cake shop crawl. We found this article on the internet before we left and it had sounded like fun. It was excellent because following someone else’s suggestions meant we tried different cakes than we might have chosen. The stand out favourite was Kugelhoupf  from the Monarch Cake Shop and not all cakes were as we expected. The black forest cake from Le Bon Continental was completely different to what we expected. But when we put aside our preconceptions of what a black forest cake should be and just took it as a cake –  it was light, creamy and delicious. The croissants from Europa were utterly different from the usual examples in New Zealand and delicious. The description of the baked cheese cake from Acland cakes was entirely accurate being “sensational”.


The other meal we really enjoyed was pastrami sandwiches from Daniel’s in the Jewish area on Carlisle street. We had gone there to get bagels from Glick’s Bakery because they are the best bagels we have ever tasted in our part of the world. We bought our bagels but were tempted by the pastrami sandwiches in the shop next door. We have watched and heard others rave about pastrami sandwiches in New York delis so we couldn’t walk past this opportunity. I was a little dubious on what it would be like with so many slices of meat in one sandwich. It was delicious. The meat is so juicy and salty, it made a very filling lunch but it wasn’t heavy. We forgot to take pictures of these sandwiches because they were so delicious we ate them.

Oh and I’ve just remembered we had the best Japanese dishes we have ever tasted at Shira Nui in Glenwaverley. Next post…

Posted by: edibleplanet | August 17, 2011

Homemade Custard Squares

We’ll get back to the great places we ate at in Melbourne next time. We’ve had snow again. This time we were here for it and it was big dumping for us. The last time I remember snow this thick was 1992.

By day three of no school and the rain now taking over from the snowing we decided to make custard squares. I wasn’t planning on making a trip to the supermarket so they had to be made with what we had in the house.

There are numerous recipes online. There is also one on the trademe forums that involves adding cream cheese. So I printed out a couple, including this one  and also had The Edmonds book open. We decided to do a bit of mixing and matching and see where we ended up.

We had sheets of puff pastry in the freezer so we got them out and the kids poked them all over with a fork and we cooked them in the oven until they were crispy. While they were cooling we got on with concocting the custardy middle bit.

We were running out of cornflour so we used 4 tablespoons of cornflour, 4 tablespoons of custard powder, 3 tablespoons of icing sugar and a little milk to mix it altogether. Then we added another 2 cups of milk, 25g butter and heated it slowly on the stove. The kids got bored of stirring it so I was told to take over. It got lovely and thick and was looking perfect. We added in some vanilla extract and then in our mixing of recipes, we added an egg yolk and some cream cheese. The cream cheese was Saudi so it had salt in it – to balance it we added some agave syrup we had lying around. The kids did the taste testing until they deemed it was sweet enough. We spread it over the puff pastry base but realised it was too thin for proper custard squares. So we heaped it on one side of the puff pastry square and cut it in half. Unfortunately the lovely thick custard we had taken off the stove wasn’t so thick now we had added the egg and cream cheese. We used the other bits of pastry as side walls to hold the custard in and stuck the whole thing in the fridge.

The custard did thicken but was still runnier than I would have liked. We were running low on icing sugar but we made a thin icing for the top and covered it in coconut. We put it back in the fridge until after dinner.

It was not looking very attractive when we got the tray out to eat it but after we cut it into squares, they looked pretty good. So good I forgot to take a picture before we tucked in. The middle was very creamy but did need to be thicker. They were delicious though and I think we do need to make them again with further experimentation.

Posted by: edibleplanet | August 2, 2011

Food Shops in Melbourne

We were very fortunate to be able to spend a few days in Melbourne last week, which of course, is heaven for foodies like us. We were discussing the difference between Christchurch and Melbourne for food with an ex Christchurch resident we were staying with. We came to the conclusion you can experience a wide variety of food from other cultures in Christchurch but you have to search it out, in Melbourne it is hitting you over the head everywhere you go.

There is also a different attitude to food over there. Even in a large suburban mall in an outer suburb there was a deli that would be the equal of any deli in Christchurch – that are never in malls due to the rent. Melbournians obviously support such places enough that they can survive while our malls are usually filled here with clothing and shoe chain stores. There seems to be less of the prententiousness that here seems to come with good food(that is only for special occasions) and more about everyone enjoying good food at very reasonable prices. We visited food shops and of course we ate out. If you are heading over there here are some of the more out of the way places we visited and enjoyed as well as of course, the wonderful food markets.

We went on a bit of a jaunt into suburbia using trains, buses and trams to visit a variety of food shops. In the suburb of Carnegie I visited Russian Tidbits (113 Koornang Road). This shop had a counter cabinet full of a huge variety of Eastern European sausages as well as shelves with all different Russian foods. From there I caught another train and a bus to visit Oasis Bakery (9/993 North Road) in Murrumbeena. Having managed to get myself across the busy four lane street I entered Oasis and it is big. A supermarket sized shop of every Middle Eastern food you could want and much more. The labels on the Oasis Bakery products are well worth a read too.

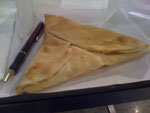
Spinach & Feta Cheese Triangle

Spinach & Feta Cheese Triangle with my pen to show just how large it was!

They also have a cafe and for $3.50AU I bought a spinach and feta triangle. It was delicious. I then couldn’t resist trying a date mamoul that was also lightly flavoured with rose water. It was far more tasty and less dry than the packaged ones I had tried before.

Another bus trip and I was in the middle of a light industrial area and opposite a big Bunnings shop. I was not sure if I had got off at the right bus stop but then I saw American flags waving outside a factory shop – I was in Moorabbin to visit USA Foods (146 Cochranes Road). Food from the USA is one region we have been finding hard to source in New Zealand. Here was everything all American. I bought a bottle of Franks hot sauce because someone had recommended it, grits – because I hadn’t found any in NZ since I stayed in South Carolina and of course how could I go past Baconnaise? Baconnaise is a mayonnaise flavoured with bacon – but not real bacon, it is kosher and safe for vegetarians according to the label. The company that makes it was started with money won from the television show – America’s Funniest Home Videos. I thought we needed to try a jar of such stuff. Coming back into New Zealand, customs almost took it off us because of the egg content. We assured them it was unlikely to be real egg (going by the bacon content) fortunately egg products of American origin are allowed into New Zealand so we made it home with our jar of Baconnaise.

We also couldn’t resist another visit back to Casa Iberica(25 Johnston Street), the neat Spanish shop in Fitzroy with its fantastic Portuguese tarts (3 for $5AU). This time we bought a Chuerrera ($20AU) for making those very tasty Spanish donuts, churros. It works really well and the dough is easy to make. Now we just have to stop ourselves from making them too often!

Back soon to share all the  yummy places we ate at.

Posted by: edibleplanet | July 10, 2011

Proper Chocolate Hail and Eierkoeken

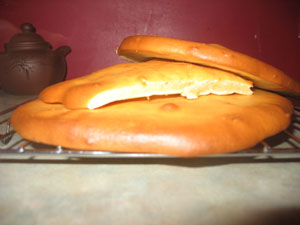
eierkoeken (egg cake)

Cooling eierkoeken awaiting some butter and hagel slag

We have been meaning to try the Dutch Hagel Slag for ages and we were talking to our Dutch neighbour about it. He just raved. He grew up with this Dutch version of chocolate hail on toast for breakfast as we grew up with marmite and vegemite.

Since I could not see any down side to a food experiment involving a chocolate product, I ended up buying the dark chocolate version to sample. The pieces are much bigger than the chocolate hail we are used to. But to compare it to the usual New Zealand chocolate hail is to compare the Auckland July earthquake with Christchurch’s June shake up – not even close!

The Dutch one is proper, little bits of chocolate. We tried it first liberally sprinkled on a piece of hot buttered toast. We all agreed, it was fantastic! It is similar to having Nutella on toast. It seems quite a treat to us, the idea of chocolate in the morning, but it definitely is tasty.

Our Dutch neighbour reckoned that the best way to have the Hagel Slag was on hot eierkoeken or egg cakes. So we decided to go for the ultimate experience and see if we could make them. There are many, many recipes on the internet. The basic ingredients usually were the same with slight alterations in proportions. In the end we chose one off a forum that was given in reply to a question about eierkoeken not rising sufficiently. It had 125g sugar, 3 eggs, 1 teaspoon of horn salt, 250g flour and 125ml milk. Unfortunately we didn’t have any horn salt handy. Horn salt is ammonium bicarbonate and is a leavening agent like the more familiar sodium bicarbonate (baking soda) and baking powder. It is a traditional ingredient in Scandinavian baking and has its advantages. You get more rise for a smaller amount of leavening agent and it doesn’t leave any flavour in the product like baking soda does. Many of the other recipes we looked at used baking powder so we substituted 1 and 1/2 teaspoons for the horn salt. The recipe said to whisk the eggs and sugar until thick and then add the dry ingredients and milk. You cook the wet dough in circles on baking paper in a hot oven. We also added some vanilla essence, since other recipes had this included and we love vanilla.

The results were not quite as I expected and they didn’t rise enough but they cooked. They were quite crispy on the outside and soft in the inside. They didn’t have much flavour – like a soft sponge cake. We took some next door for a taste test and the flavour was perfect – they were deemed just a bit too flat.

The soft, egg cake was nice with melted butter and the Hagel Slag but so far we have preferred it on toast, though another batch of eierkoeken might change our minds. Next time we will try whisking the egg whites and yolks separately to get more air into them.

It was a tasty and fun experiment especially since while searching for recipes and finding out about the egg cake, we found out the province of Zeeland in the Netherlands consumed the most eierkoeken. Here we were in New Zealand trying to make our own.

Posted by: edibleplanet | May 26, 2011

Why do we eat?

three red traffic lights

Danger, danger!!

On Monday our children had their yearly dental check up, all was well and as we left the lovely dental nurse gave us the latest info sheet put out by the district health board on eating for healthy teeth. It was on a bright red piece of paper and had a green light traffic light picture on one side with everyday foods underneath it and on the other half of the page was a red light and underneath this, it said “food for special occasions”. Many of the foods in the special occasions section were fair enough – fizzy drinks, sweets and chocolate,  but then we also noted biscuits, cake, honey, jam and “dried fruit eg raisins” were there too. This sheet sparked quite a rant in our house. What were the people who wrote this sheet thinking? Our lovely homemade jam only on special occasions? If they had already thought up the idea of using traffic lights, why not use the orange caution for foods that you need to watch but still have regularly?

Last week Karl had happened to watch a NZ made cooking show on Kidzone. They were making pasta-bake with broccoli and other extremely healthy foods. There was even dietician who came on to tell viewers that they shouldn’t be cooking with fat or oil, and should try steaming instead. Steaming food is a valid and lovely way to cook food, but it has to be done carefully. I can’t think of a quicker way of reducing food to a bland soggy mess than just bunging it in a pot and steaming it! And yet the other night when we flicked past the food channel the chef was making a baked Alaska with ice cream, egg whites, sugar and slices of raspberry sponge roll. A dish our kids would have had a ball making. It seems that such cooking is for adults only these days.

Our question is this – Why? Why is all information directed at children’s food pointed at health and not balance? Why are we not teaching our children to enjoy food, the huge variety it comes in and appropriate portion sizes? Food is more than just fuel for our bodies, it is emotional, it is about sharing, it is about relationships as we cook for each other and it is about tastes and smells and delighting our senses. It is art, it is memories, it is comfort and adventure.

It seems that if you ate the way the dental nurses and dieticians advocate food would cease to be a joy, and instead would be scientifically calculated to do you the least harm. This is not the attitude we want our children to have about food! It’s really hard watching our skinny, active 6 year old worrying about fat in her diet, and getting confused about why her parents (of all people) condone this dangerous daily consumption of jam.

Sometimes it feels we have become so afraid of food we miss the point. Sure salt can be bad, but the western style of cooking food without salt is awfully bland. If salt is an issue you can always cook like parts of India where flavours are balanced by putting in a lot of spices, garlic and onions rather than bringing out subtle flavours by adding salt at the end of a dish. We cook things in fat for a reason – it is tasty and satisfying. Of course too much is bad, but in places such as the USA they are finding offering low fat alternatives doesn’t help the problems of obesity. People just eat more to be satisfied or treat themselves more often because they think they are eating low fat all the time. This article from Nature suggests moderate fat reduction in the diet is much more likely to be sustainable and thus beneficial. We find it slightly offensive that maybe by letting our kids taste oil or fat we’ll immediately abandon our wonderful, varied menu and instead get fish and chips every night. Our kids eat well. And yes, we add salt and cook food in oil where appropriate. We enjoy sweet things as well as savoury.

One of the things I loved about our shop was a couple of local primary school boys who used to come to all our tastings and cooking demonstrations and dare each other to try stuff. We always encouraged them and asked them what they thought. One of them in particular had a very good palate. It was great to see them become increasingly confident to try the Mexican cactus strips, the cold sour cherry soup or the stuffed vine leaves or buckwheat pancakes.  Talking to the mother of boy with the great palate she said he was a very fussy eater at home but had become increasingly less fussy and open to try things since he began visiting our shop. I think that is more the attitude we need to foster – a love of trying foods, their flavours and cooking them, then takeaways from conglomerates have less appeal. We should be teaching variety and balance, not stripping everything down to the least harmful components.

A favourite quote which seems so apt for the silly red sheet (now in our recycling bin) is the following:

“Food these days is often identified as the enemy. Butter, salt, sugar, eggs are all out to get you. And yet at our best we know better. Butter is… well, butter: it glorifies almost everything it touches. Salt is the sovereign perfecter of all flavours. Egg are, pure and simple, one of the wonders of the world. And if you put them all together, you get not sudden death, but Hollandaise – which in its own way is not one bit less a marvel than the Gothic Arch, the computer chip, or a Bach fugue.”

Robert Farrar Capon – The Supper of the Lamb

Older Posts »

Categories